The Journey There...

I got up bright and early today to be at the Gemini offices to meet Manuel Paredes, who would be my guide at Gemini today. Thankfully, I survived rush-hour in La Serena (in my ute!) and made it on time - only made one small error in directions, which I managed to correct very easily.
Once I had met Manuel, I had to go and get my authorisation signed off, which consisted of providing my passport number and the vehicle registration number, then signing a form, which I had to hand in at the gate of the road to the telescope.
We headed off on the road towards Vicuña. About half way between La Serena and Vicuña we took a turning off to the right onto a dirt track, which we followed for not very long before getting to the gate to the road up to Cerro Pachon and Tololo. I handed over my authorisation papers, got told the rules of the road by Manuel and we set off - me following Manuel through a cloud of dust!
The road pretty much all the way to the telescope is just a dirt track, but a reasonably well-maintained one. Even so, by the time I got to the top my ute was no longer quite as shiny and I had lots of dust up my nose!
Inside The Building
So, here I was, at almost 2700m, and at my first professional observatory - how exciting! And from the outside, the size was impressive, but kind of what I expected. It was VERY windy at the top, so we didn't hang around outside for too long.
We headed indoors and first went to the 'Crew Room' which is a mixture of a coffee room and a video-con meeting room. We met a few of the daytime staff - engineers - of whom there are about 15 who work there each day. And they travel there and back every day. At many other observatories, the daytime engineers work in shifts, but not these guys. One guy told me his typical day is about 14 hours long if you include the travel there and back!
Manuel told me a bit about Gemini-S and N, and the history of the telescopes. Construction on Gemini-S started in around 1995. One of the engineers told us that one year they had to stop construction completely, and close the site down for the Winter, as the snow storms were so bad. First light for Gemini-S was around 2002.
After this, Manuel took me around the various different bits of the building...we'll start with the best!
The Telescope
 |
| Gemini-S telescope - with me for scale! |
The size of the telescope did, of course, impress me. I had an idea what it would be like, having seen instruments like KMOS and SCUBA 2 in the lab back in Edinburgh, but still, my first time standing looking up at such a large telescope will be a memory I keep for a long time.
The room is very cold - must remember to take gloves with me when I go to visit Paranal! I knew it would be, since the telescope needs to be maintained at the same temperature as outside, but it really was chilly! Manuel explained that everything in the telescope dome is painted with a special paint which has low heat emissivity, to help keep it all at a low temperature.
Underneath the telescope (just above my head in the photo) the instruments are attached. Gemini can work with up to 5 different instruments in one night. Currently it has just 3 instruments attached - GMOS (mentioned in my last blog post), a calibration instrument (the 1st thing which is needed to be done each night is to calibrate the telescope), and NICI which is a coronograph used to find exoplanets.
Gemini currently uses Active Optics to compensate for the atmospheric distortions. I must admit, active optics is not something I am particularly familiar with, but from what I have understood (from Manuel and a bit of googling!) it is a technology which uses natural stars and deformable mirrors to calibrate for the distortions. They are also in the commissioning phase of an adaptive optics system called GeMS, which uses a laser guide to create 5 laser guide stars, and again, deformable mirrors. It is the only adaptive optics system in the world currently which has 5 laser guide stars, and it has 5 because of the large field of view the telescope has. They are hopeful it will be finished the commissioning phase and being used for science next year sometime.
The telescope weighs around 300 tonnes and sits on a pillar which goes around 11m into the mountain. This is for earthquake protection. This design means that the telescope can withstand an earthquake that measures up to 8 on the Richter Scale.
To move the telescope with high precision and accuracy, the telescope's hydraulics system involves a layer of oil on which the telescope sits. In theory, if you remove all the brakes from the telescope, you could move this 300 ton piece of equipment with one hand - impressive!
The Control Room
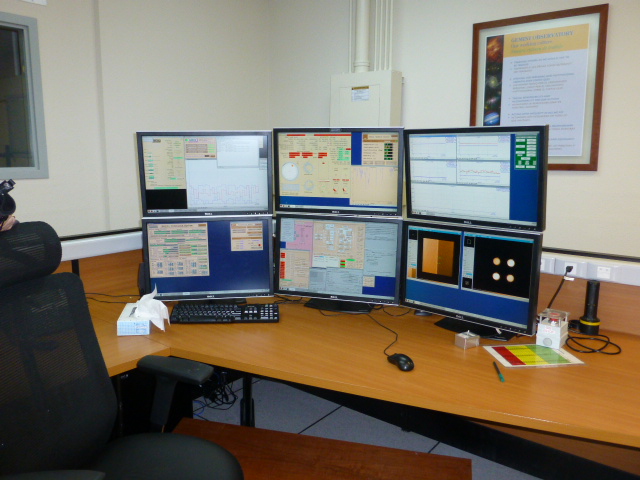 |
On any given observing night (and in theory Gemini is used for observing 365 nights of the year - of course there are occasions when the telescope needs to be closed for maintenance, or adverse weather) there are 2 people working in the control room. The astronomer, who controls the instrument, and the Supporting Officer who controls the telescope. At the end of the day shift, there is a handover from the engineers to the astronomer and supporting officer, basically to say that the telescope is good for use. This is why the engineers are there every day - to ensure the telescope is good for using all night for observing.
Once GeMS is up and running for science, there will be 2 more people working each night. One to operate the laser and another, a 'spotter'. The 'spotter' has to keep an eye out for any planes flying overhead!
On an average night, 7GB of data are collected, which are sent via a microweb to La Serena and then on to the data archive in Victoria, Canada. A principal investigator can have access to their rough data from their observation just 5 minutes after the observation has been done.
The Mirror
I think the mirror deserves a section all of its own as I found this the most fascinating and interesting aspect of the telescope.
The primary mirror, or M1 as it is referred to in the field, is 8.2m in diameter, and weighs 20 tonnes. During the day it is covered up to save it getting any unnecessary dust on it. Manuel removed the cover of the mirror a little so I could see it:
 |
| The very shiny M1 |
 |
| Shiny M2 with M1 reflected in it |
M1 gets cleaned every Thursday, using carbon dioxide. The mirror is tilted to 90° and the CO2 is applied, freezing the particles of dust, which then fall off the surface of the mirror. Additionally, every 6 months, the mirror is cleaned with water, soap and mops!
The re-coating process takes place every 6-10 years, and takes 15 days for the whole thing to be completed...and it's some procedure!
The stages are as follows:
- M1 is removed - this involves removing all the instruments from the telescope, then removing the mirror using a big crane. The mirror is lowered down to Level 1 (from Level 4 where the telescope is) and put on a special cart.
- The mirror is cleaned with water, soap and mops
- It is then dried by laying paper (the same sort of paper towels we would dry our hands with) over it
- Acid is applied over the paper, which removes the silver layer, then the paper is removed, and the mirror is washed again with distilled water. At this stage, the mirror is transparent as it doesn't have the silver reflective layer anymore. It is still slightly reflective but if you put your hand underneath it, you would see it through.
- M1 is then dried with the 'Air Knife' which is basically like a big hairdryer
- M1 is picked up by the crane which has a 'grabber' attached to it - a bit like the arm in one of those fairground games where you have to try and pick up a cuddly toy to win it by controlling the arm
- The cart M1 was sitting on is moved to another room and the bottom section of the coating chamber is put in its place
- M1 is lowered into this chamber and the chamber is closed up
- A vacuum is created inside the chamber, removing any humidity and air.
- Then the coating process is started - this involves 3 magnetrons, one for each of the materials which is to be coated on the mirror. Sadly, I didn't understand fully the process of the sputter coating using the magnetron....need to do some more research I think!
In the end, the mirror gets a coating of first nickel chromium (as an adhesive), then the silver, then another coating of nickel chromium and finally a protective layer of silicon is applied. This layer is 1000 times thinner than a human hair!
I had a fantastic day at Gemini and found it so interesting. Huge thanks to Manuel for being a great guide...I'm looking forward even more to my visits to the other observatories!
Just to top the day off, on the journey back I saw another of those South American Gray Foxes, and this time I managed to get a picture...

For those who are interested, I'll be posting all my photos from Gemini on my flickr account - see the link on the right hand menu.
No comments:
Post a Comment